


Our prior post in this series, Ingest Syslog Data Via Apache NiFi, covered the basics of using Apache NiFi to load balance incoming syslog events. Here you’ll go a step further by querying a MySQL database (our example contains entity events from Home Assistant, the open source home automation toolset). Shown in Figure 1, several linked NiFi processors will reformat the output to JSON on its way to a syslog server.

Figure 1: NiFi processors can be linked together to format SQL data for syslog ingestation.
Java Connector – Assuming you’ve installed NiFi in /opt/nifi per instructions in the earlier post, start by downloading the required Java connector.
mkdir -p /opt/nifi/drivers

cd /opt/nifi/drivers

wget https://repo1.maven.org/maven2/mysql/mysql-connector-java/8.0.19/mysql-connector-java-8.0.19.jar
QueryDatabaseTable – You now have the MySQL connection drivers. Next you’ll create a QueryDatabaseTableprocessor.
Drag the processor onto the canvas, then double-click it and go to settings. Click the Scheduling tab, then Run Schedule. Change it to query the table every 15 seconds.
Now go to the Properties tab to configure the MySQL service. Click the blank space adjacent to Database Connection Pooling Service, then select Create New Service (Figure 2).
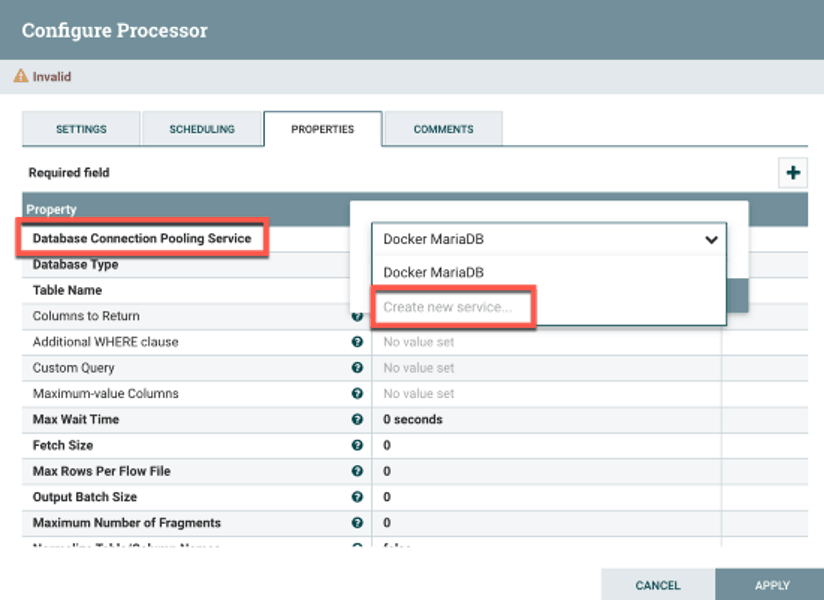
Figure 2: Start by creating a new service.

Figure 3: Name the controller service and click Create to complete the step.
Next change the hostname and database variables in the connection URL to reflect your own environment. Figure 4 shows a completed example.
Database Connection URL:

jdbc:mysql://:3306/?serverTimezone=UTC

Database Driver Class Name: com.mysql.jdbc.Driver

Database Driver Location(s):

/opt/nifi/drivers/mysql-connector-java-8.0.19.jar

Database User: A user with permissions to access the DB.

Database Password: Password for above.
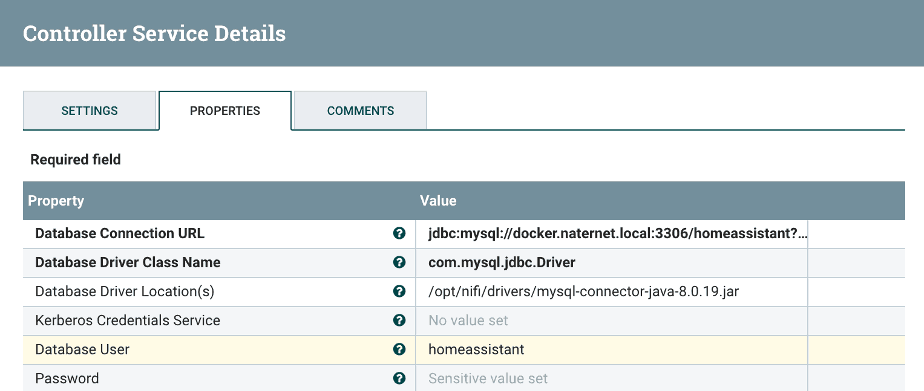
Figure 4: Database settings are in the Properties tab.
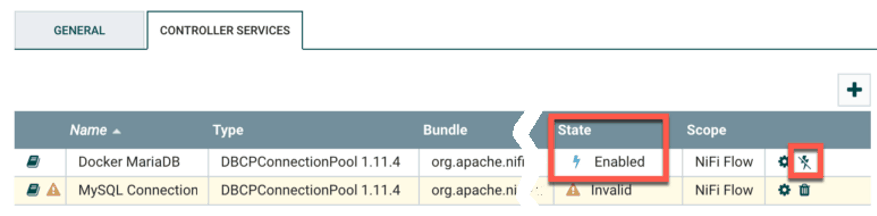
Figure 5: Enable the connection service.
Here, Maximum-value Columns acts as a placeholder so the processor knows which data had previously been collected (you want the connection to repeatedly pull the same data). Whatever its value, the column should auto-increment as tabular rows are added (e.g., the state_id column in Home Assistant increments by 1 in Figure 6).
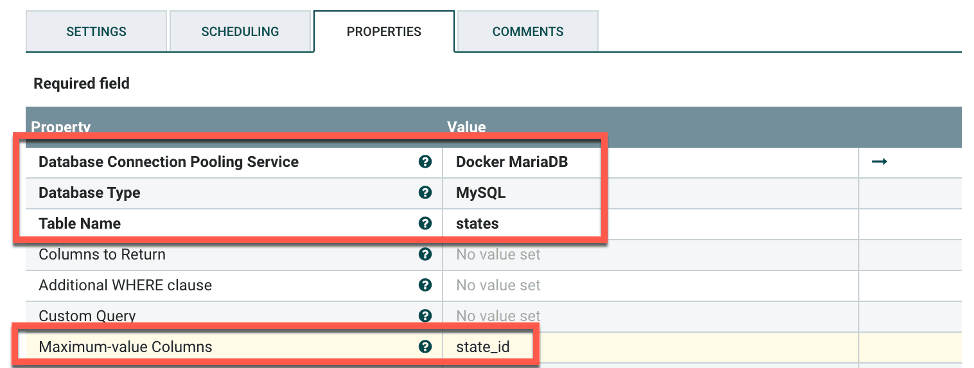
Figure 6: Maximum-value Columns should advance in increments as rows are added to the table.
Database Connection Pooling Service: The one you'd created above.

Database Type: MySQL

Table Name: The table of the database you're querying.

Maximum-value Columns: The incrementing value
With your database connection configured, you’ll now want to convert that processor’s data output from Avro to JSON format.
ConvertAvroToJSON – Create a ConvertAvroToJSON processor and connect the QueryDatabaseTable to it. Select success under Automatically Terminate Relationships in its settings (likely the only option).
SplitJSON – Unmodified, the flow will include a huge number of database events in a giant blob. You’ll split these into individual events using a SplitJSON processor to pass along to the next series processor. There is only one value to change for SplitJSON (figure 7):
JsonPath Expression: $.*
You’ll also want to select failure and original under Automatically Terminate Relationships in its settings.
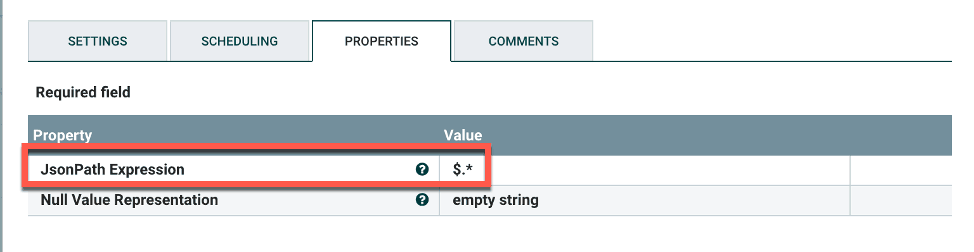
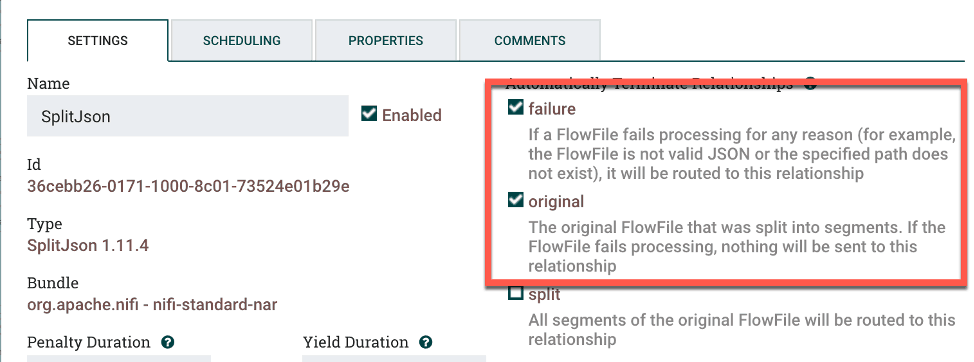
Figure 7: Enter “$.*” for the SplitJSON processor settings.
The last step is to output the data in pseudo-syslog format. That is, you’ll send it somewhere on 514/UDP and leave it to the syslog receiver to timestamp it.
PutUDP – Last in the chain, create a PutUDP processor, for which you’ll only plug in its hostname and port. Also, go to the processor settings and check failure and success under Automatically Terminate Relationships (Figure 8).
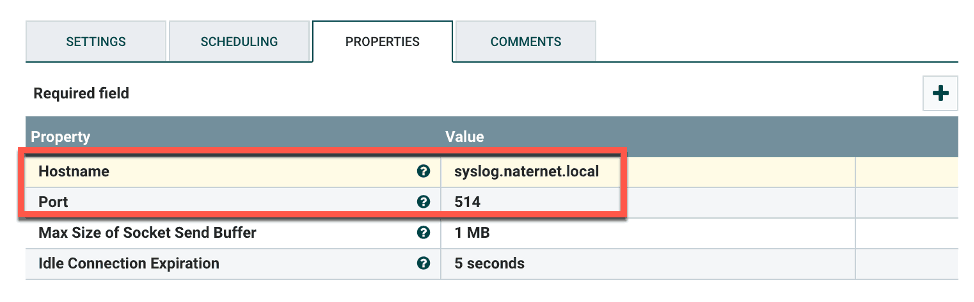
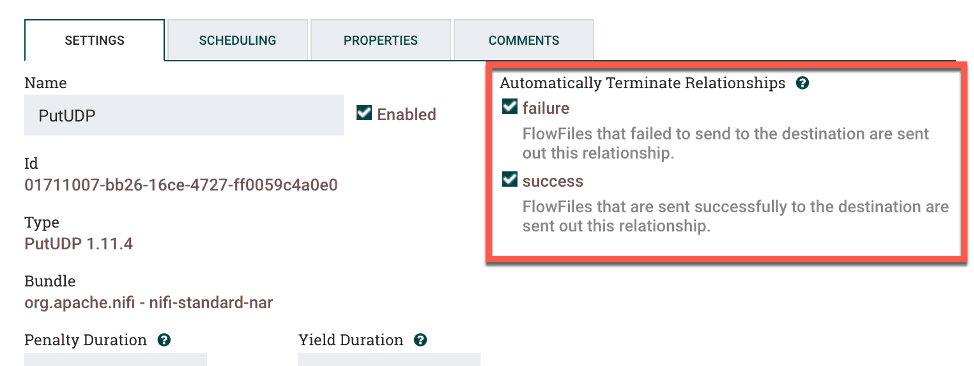
Figure 8: Enable PutUDP processor settings and check failure and success in Automatically Terminate Relationships.
The final step is to right-click the canvas and select Start to fire up your NiFi processor chain. The processor indicators should turn green.
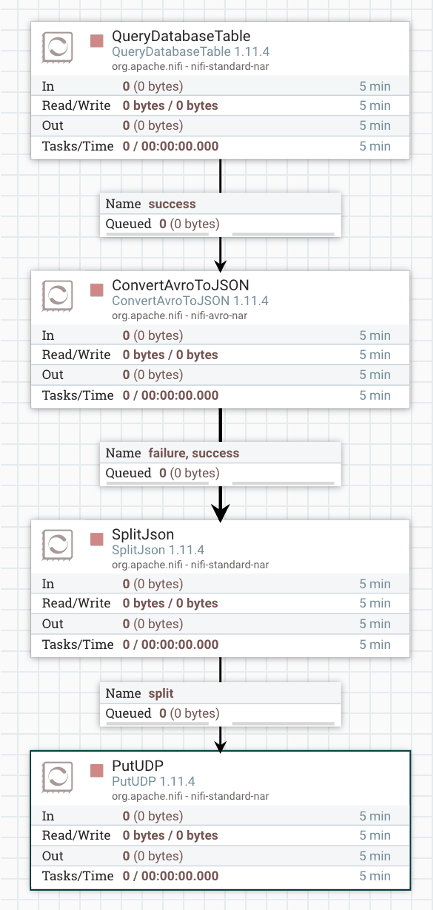
Figure 9: Success! The NiFi processor chain you’ve created.
I hope you found this useful. Hit me up with questions on NiFi with a comment on our social media platforms.
Similar Posts

Augmenting Microsoft Sentinel SIEM: The Power of Exabeam for UEBA and TDIR

Exabeam Unveils 2023 Partner of the Year Award Winners

Exabeam IRAP Assessment Completion Creates New Opportunities for Partners in Australia
Recent Posts

What’s New in Exabeam Product Development – March 2024

Take TDIR to a Whole New Level: Achieving Security Operations Excellence

Generative AI is Reshaping Cybersecurity. Is Your Organization Prepared?
Stay Informed
Subscribe today and we'll send our latest blog posts right to your inbox, so you can stay ahead of the cybercriminals and defend your organization.
See a world-class SIEM solution in action
Most reported breaches involved lost or stolen credentials. How can you keep pace?
Exabeam delivers SOC teams industry-leading analytics, patented anomaly detection, and Smart Timelines to help teams pinpoint the actions that lead to exploits.
Whether you need a SIEM replacement, a legacy SIEM modernization with XDR, Exabeam offers advanced, modular, and cloud-delivered TDIR.
Get a demo today!